Cul-de-Sac Design Example
Updated October 16, 2018
This article applies to:
- RoadEng Civil
- RoadEng Forestry
Download the example files covered in this example: HERE
This example explains how to use reference features to create a Cul-de-sac. Similar techniques can be used to create turning lanes, widenings, landing, parking lots. etc.
Reference Features
Reference features can be used to control the cross section template and display intersected and projected features (https://support.softree.com/knowledge-base/terrain-module/profiles-and-draped-features/intersected-and-projected-features) in section and profile.
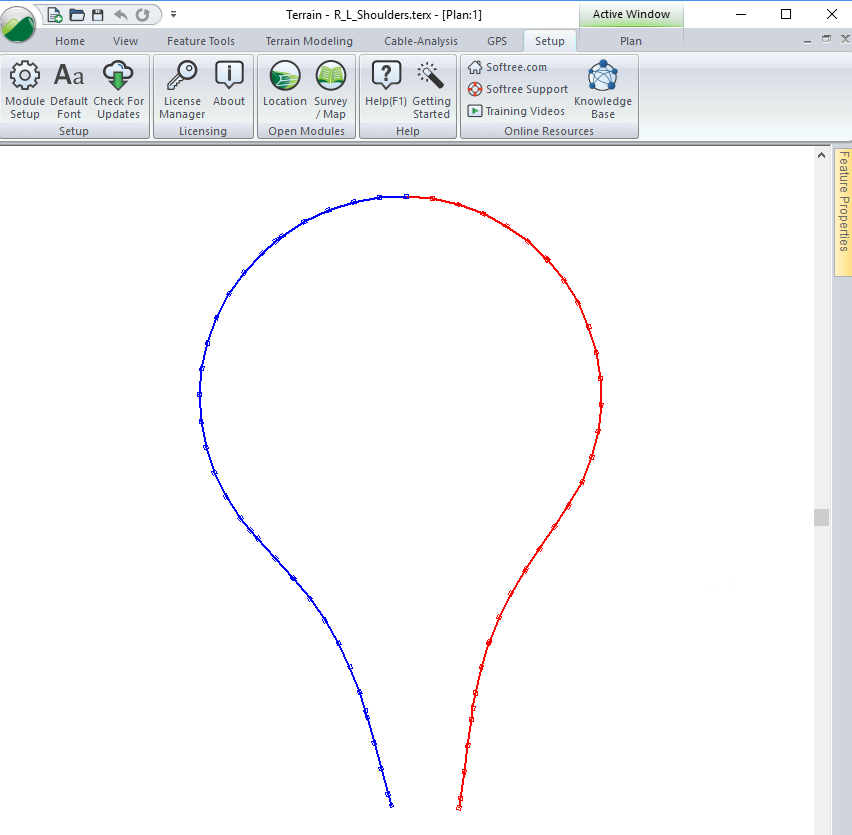
Prior to this example, a terrain file with features running along the right and left shoulders has been created as shown in Figure 1 below.

Figure 1: Left and Right Road Shoulders
Note: creation of the road edge features can be done in Terrain or using multiple horizontal alignments in Location.
Creating Reference Features - Lane and Shoulder
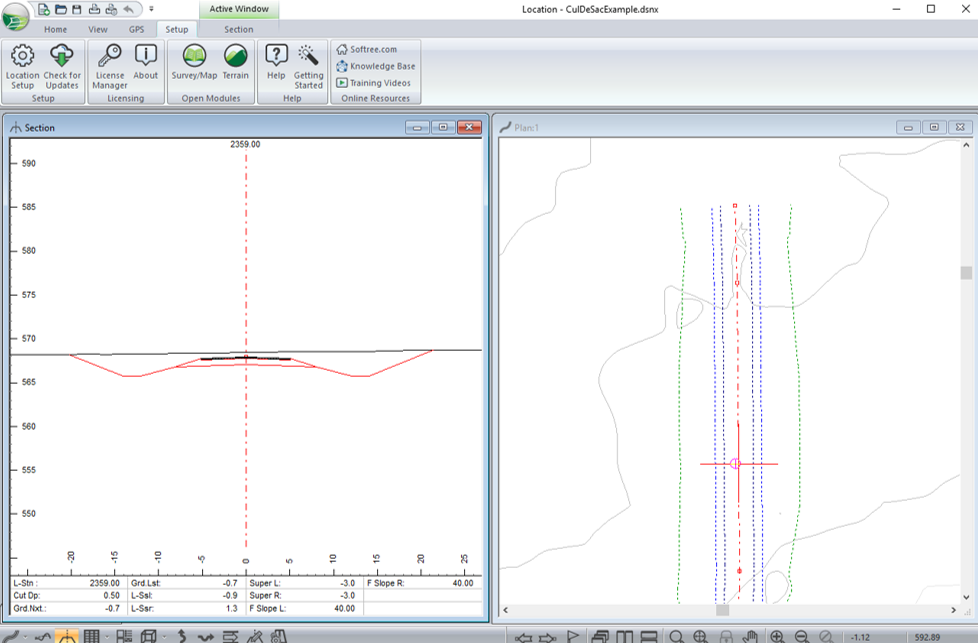
- Open the Location module. Open CulDeSacExample.dsnx (included with this example). The screen should display a cross section and a plan view as shown in Figure 2.

Figure 2: Left and Right Road Shoulders
- Choose menu Setup | Location Setup | Alignment | Reference Terrains.Set Reference terrain 1 to be R_L_Shoulders.terx.Press OK.
- Choose menu Features.Setup Reference Features RF 1 and RF 2 as shown in Figure 2 below:

Figure 3: Setting up Lane and Shoulder Reference Features.
- For both the reference features, set the Section tab settings to Intersection and select an appropriate symbol (see Figure 4 and 5 below):

Figure 4 – Setting up Cross Section Display of Reference Features

Figure 5 - Cross Section Display of Reference Features
Attaching the Reference Features to the Template
- Choose menu Home | Templates. Right click on Rural I – left component and change the AcpWidth to attach to Reference Feature 2 (C-Line-1) as shown in the figure below.Similarly, attach Rural I – right to Reference Feature 1 (C-Line-0).Press OK.

Figure 6 – Template Reference Features
- Your template should now follow the shoulders of the 2 reference features as shown in Figure 7 below.

Figure 7 – Template Attached to Reference Features.
- Close Location, don’t save the changes.