Adding Rectangle Sub-View Items
Updated July 18, 2024
This article applies to:
- RoadEng Civil
- RoadEng Forestry
Note: This article/tutorial continues from the previous example.
Rectangles can hold typed text or many pre-defined text items.
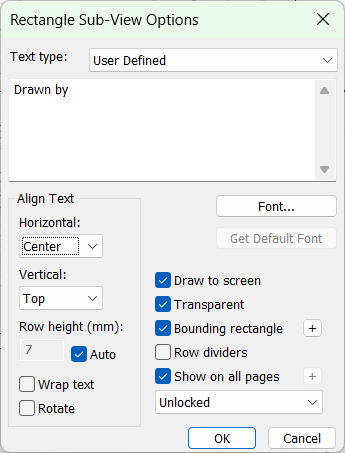
21. Multi-Plot | Rectangle drop-down list | Insert Rectangle. A Rectangle will appear in the middle of your sheet with the options dialogue box as shown below.

Figure 1: Rectangle Sub-View Options dialog.
The Rectangle Sub-View Options Dialogue opens automatically when you create a new rectangle, but you can also access it from a <right-click> on any rectangle sub-view and selecting Rectangle Sub View Options or by <double left-clicking> on the Rectangle Sub-view.
Note: Sometimes it is useful to use an empty rectangle just for its border graphic (User Defined, no text).
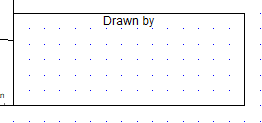
22. Type “Drawn By” in the text box. Multiple lines are allowed. Change horizontal alignment to Center. Check the Wrap text option. Click on the Font button and change the size to 12. Press OK twice.
Arrange the new rectangle to the lower right of the page as in the figure below.

Figure 2: Drawn by Rectangle.
23. Create two more rectangles:
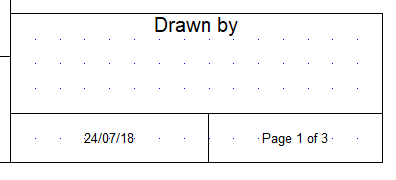
- In the first, select Print Date from the Text type drop down menu.
- In the second, select Page X of N from the Text type drop down menu.
24. Arrange the two new rectangles to fit in the first rectangle as in the figure below.

Figure 3: Print Date and Page Number Rectangles.
Notice how the snap to grid feature helps line up edges.