Add a Curve Table
Updated August 19, 2024
This article applies to:
- RoadEng Civil
- RoadEng Forestry
Note: This article/tutorial continues from the previous example.
In this section, we will create a horizontal Curve Table sub-view and examine some of its options.
17. With the PlanProfile chapter selected, Multi-Plot | Tables | Horizontal Curves to create the table.
18. Move and size the table until it fits on the right of the Plan and Profile graphics. We can make further adjustments to its layout and content:
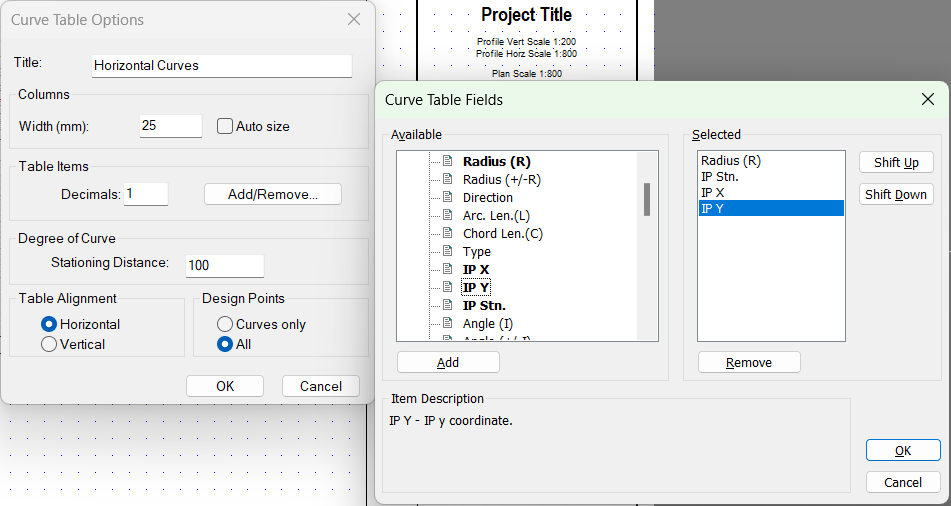
o <Double-click> on the Horizontal Curve Sub-View table to open Curve Table Options.
o Change the Column Width to 25mm.
o Select Design Points All to include points of intersection (IPs) with no curve attached.
o Press the Add/Remove button to open the Curve Table Fields dialogue box shown in the
Figure below on the right.

Figure 1: Curve Table Fields dialog.
19. Add and Remove items (<double-click> works) until you have only Radius (R), IP Stn, IP X and IP Y in the Selected column as in Figure 1.
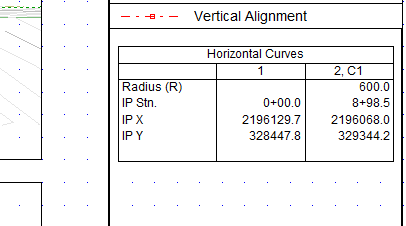
20. Press OK in both dialogue boxes to see the results as shown below.

Figure 2: Horizontal Curves Table.