Add a Legend
Updated August 19, 2024
This article applies to:
- RoadEng Civil
- RoadEng Forestry
Note: This article/tutorial continues from the previous example.
In this section, we will create a legend sub-view item and examine some of its options.
10. With the PlanProfile chapter selected, select menu Multi-Plot | Insert Legend to create a legend item.
Most of the legend items created automatically need to be removed; some of those remaining will need to be renamed.
11. <Double-click> on the legend to open Legend Sub-View Options.
12. Click on the Items tab of the Legend Sub-View dialogue box.
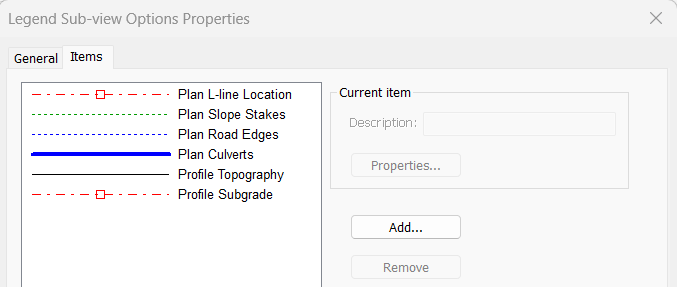
13. Select and Remove all but the items shown below on the top. Multiple select is allowed use <Ctrl + Click> or <Shift + Click>.

Figure 1: Legend Sub-view Options dialog
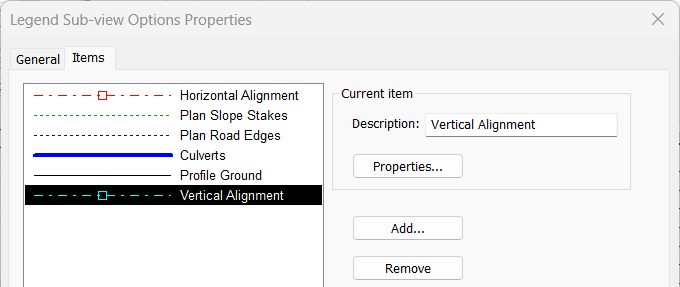
14. Select items on the left one at a time and change the Description as in Figure 2 below.

Figure 2: Legend Items description modified.
At this point you may wish to experiment with the other buttons. The Properties button allows you to change the line, symbol and hatching for any item.
15. Click on the General tab, change the number of columns to 1 and press OK.
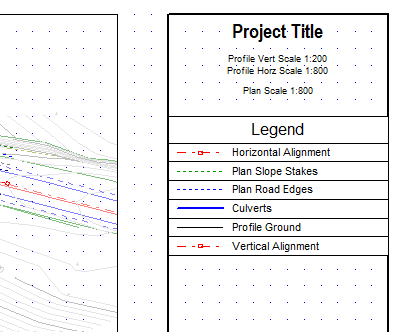
16. Finally move and size your legend so it fits nicely on the right side of the Plan and Profile graphics. See Figure 3.

Figure 3: Legend sub-view displayed in PlanProfile.