Back to Location Module
Creating and Positioning Sub-Views
Updated August 22, 2024
This article applies to:
- RoadEng Civil
- RoadEng Forestry
This Knowledge Base article is an excerpt from one of our tutorial files. The files referenced in the article, as well as the full tutorial document, are available in our Tutorial Installer.
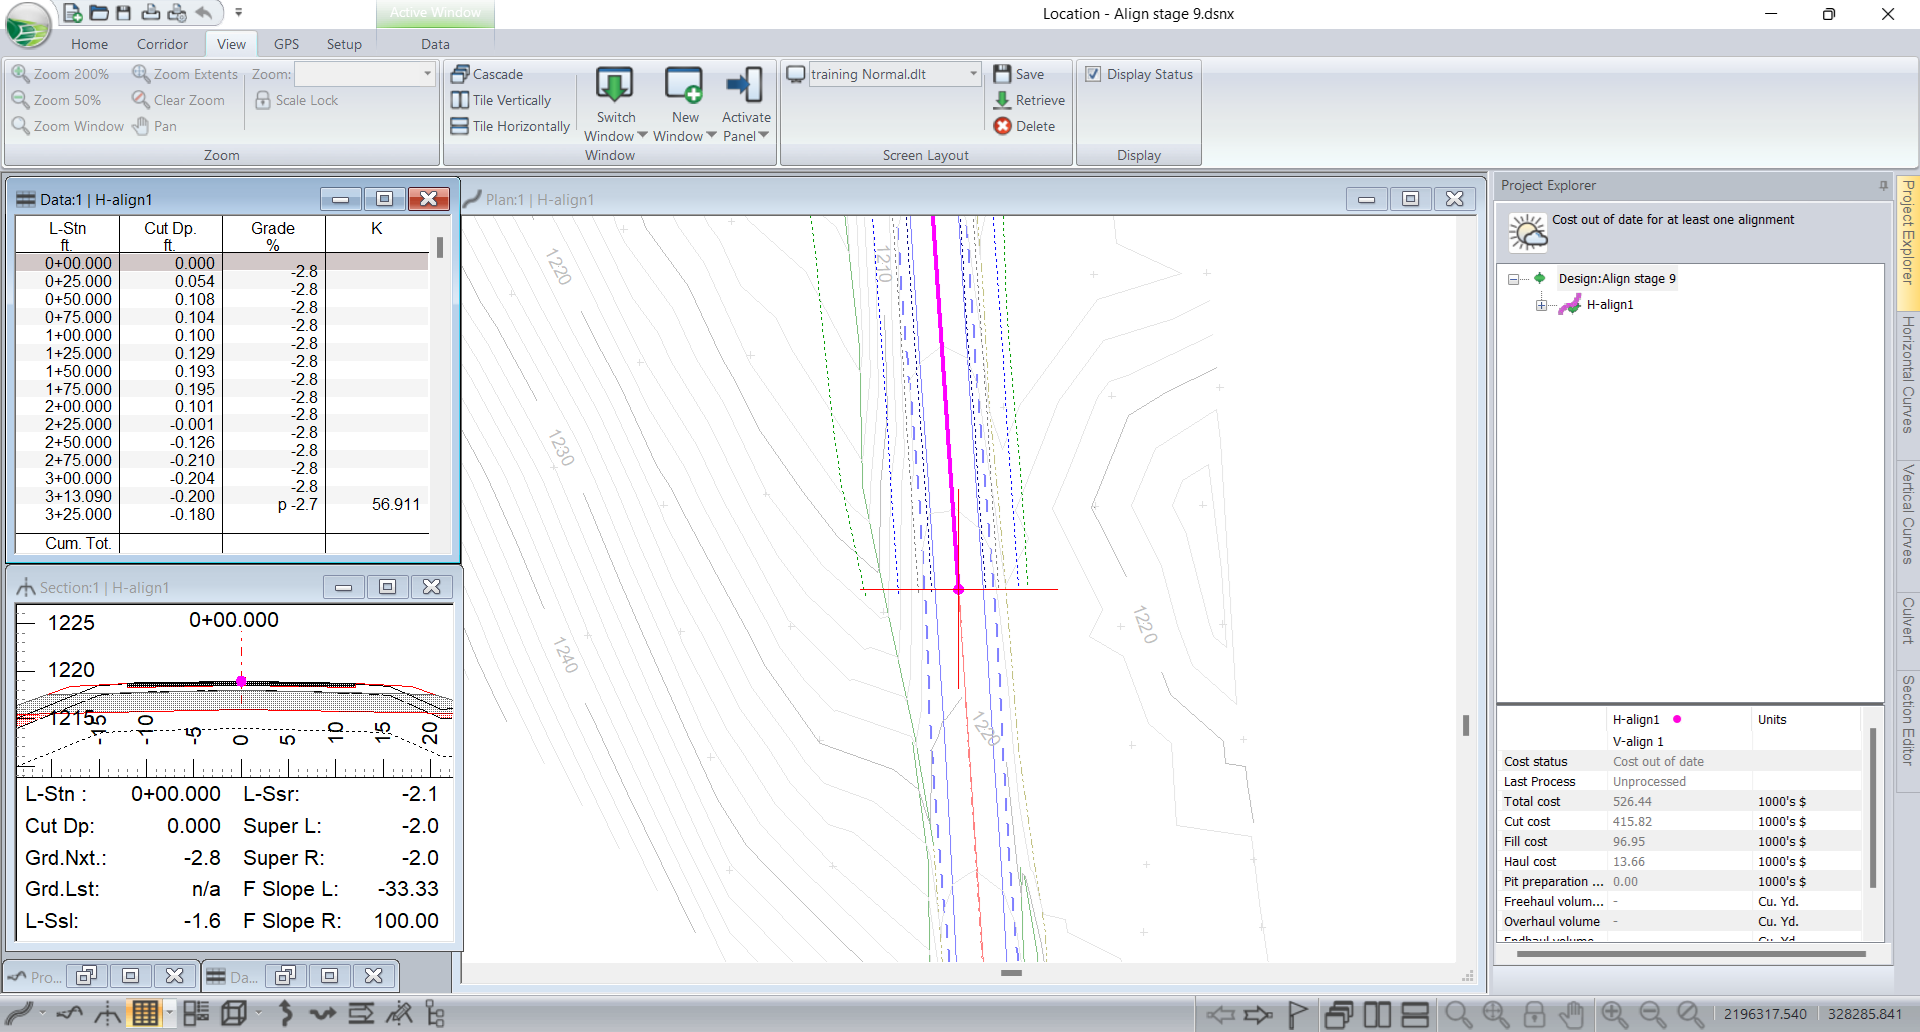
1. File | Open in Location module. <RoadEngCivil>\Location\Align stage 9.dsnx.
2. Change screen layout: View | Screen Layout dropdown, select training Normal.dlt from dropdown list.

For our example purposes, this design is considered complete from an engineering point of view. Now, we want to produce output that a contractor can use to bid on and/or build the road.
3. Press the Multi-Plot in the windows toolbar. This opens a Multi-Plot window and display bar on the left-hand side. Note that multi-plot is organized in the Book, Default and Page levels. The window opens on the page level.