Hatching
Updated May 08, 2025
This article applies to:
- Terrain 3D
- Terrain Forestry
- RoadEng Civil
- RoadEng Forestry
This Knowledge Base article is an excerpt from one of our tutorial files. The files referenced in the article, as well as the full tutorial document, are available in our Tutorial Installer.
-
 File | Open <Terrain>\ CAD\park map.terx, if not continuing from the previous example.
To complete the example, will be use hatching to shade the park area.
-
Highlight the park boundary with the Selection
 cursor.
 -
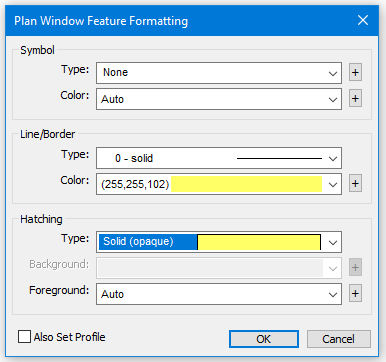
Feature Tools | Line Types, Symbols. Use the following settings. Then press OK.
-
Symbols to Type: None, Color: Auto
-
Line/Border Type: 0-Solid Color: Yellow (255,255,102)
-
Hatching to Type: Solid (opaque). Foreground: Auto
-
Figure 1: Plan Window Feature Formatting Dialogue Box
Note: (255,255,102) is a notation for Red, Green, Blue values. It is possible to create any color (supported by a graphics card) by clicking on the![]() button beside the color combo box and entering an RGB value.
button beside the color combo box and entering an RGB value.
-
With the boundary still selected, Feature Tools | Arrange Order | To Back.
At this point your map should look similar to the figure below. You may need to refresh (View | Repaint All button) or move your center wheel to see the changes.

Figure 2: Map with Shaded Boundary Polygon
-
 File | New. Do not save changes.