Exploring Multiple Areas of Deflection
Updated August 14, 2020
This article applies to:
- Terrain Forestry
- RoadEng Forestry
Files for this tutorial section on cable analysis can be downloaded here: Cable Analysis.zip
The Explore Deflection tool was created to explore multiple cable roads from a single point (usually a landing). This tool builds upon the concepts previously introduced and can be used to instantly analyze deflection in multiple directions from a single point. The following example will show you how to configure and use the Explore Deflection tool.
-
 File | Open <Terrain>\Cable\CableAnalysis - 1.terx.
 - In the Cable-Analysis tab press the
 Enable button (this button is only available if the Plan window is active – click in the Plan title bar to activate). The D-Line Explore Options dialogue box will appear as shown below.
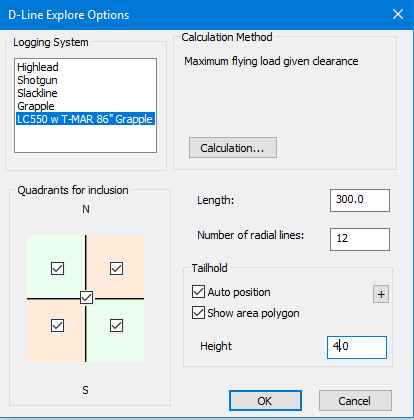
Figure 1: The D-Line Explore Options dialog box
3. Ensure the settings match those shown above:
- Select the Logging System.
- Set Length to 300, the Number of radial lines to 12.
- Set both Auto position and Show area polygon.
Set the Tailhold Height to 4.0.
4. Press the Calculation button and the D-Line Calculation Options dialogue box will appear as shown below.
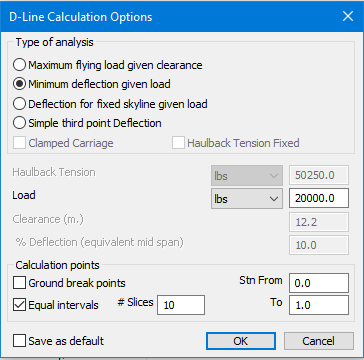
Figure 2: The D-Line Calculation Options dialogue box
5. In the D-Line Calculation Options dialogue box, change the type of analysis to Minimum deflection given load and set the load to 20000 lbs. as shown above. Leave the remaining settings as their default values.
6. Press OK to return to the D-Line Explore Options dialogue box; press OK again to return to the main screen.
7. In the Plan view, the cursor symbol![]() will have changed. Click near the center of the topo surface to see radial D-Lines extending out from that point as shown in Figure 3.
will have changed. Click near the center of the topo surface to see radial D-Lines extending out from that point as shown in Figure 3.
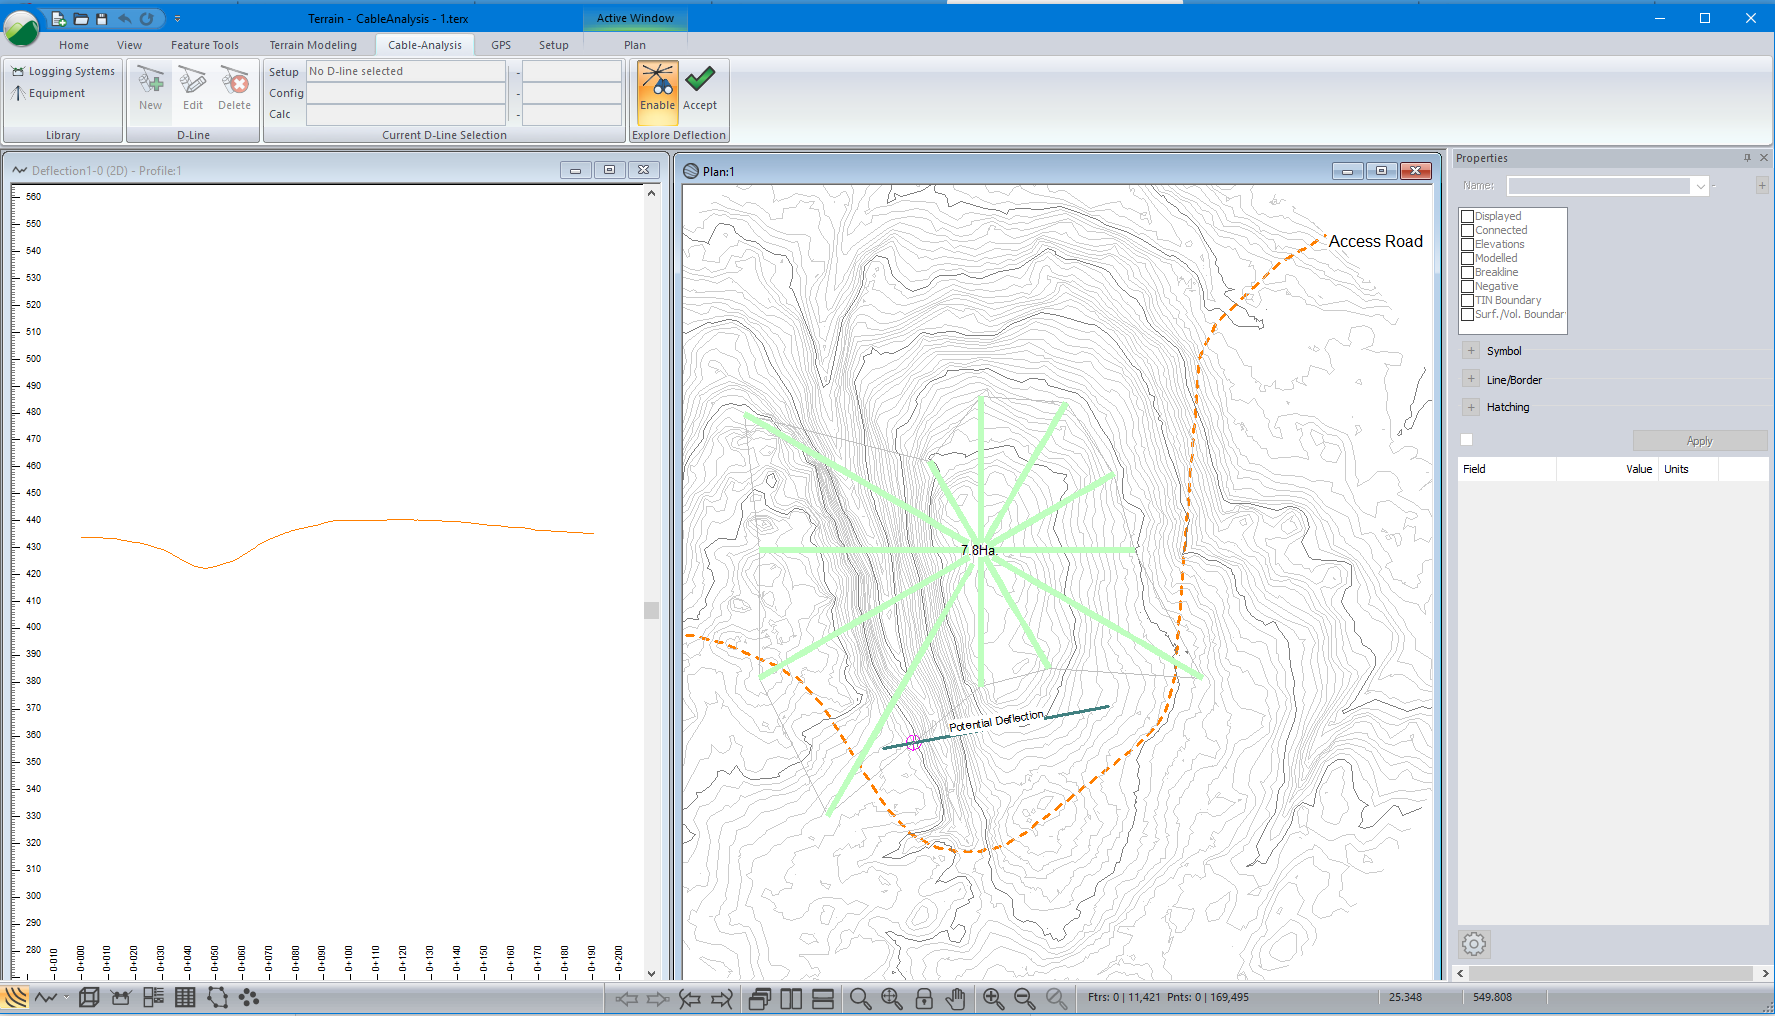
Figure 3: View of the Explore Deflection tool in use
In the Plan view, the green lines extending out from the chosen point indicate the maximum distance that clearance is maintained while using the assigned parameters. You can click again at another location and the radial lines are updated to reflect the conditions at the new site.
8. Click again near the edge of the surface so that some of your 300 m D-Line features fall off the model. You will be prompted with the message below (unless you have already disabled it). Set the Don’t display this message again check box, then press OK, to prevent future warnings in this session.
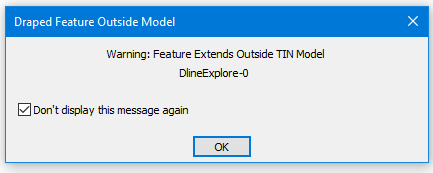
Figure 4: Draped feature warning
9. Continue clicking in the Plan window until you find a location you would like to save. Then press the ![]() Accept button in the Cable-Analysis ribbon.
Accept button in the Cable-Analysis ribbon.
This will save the radial lines as new features in the terrain file and they will no longer appear faded. All the new features are named "D_Explore" and are numbered sequentially from the easternmost ray in a counter-clockwise direction. An example is shown below in Figure 5.

Figure 5: Radial lines as they are displayed after accepting an Explore operation
10. Select one of the new radial lines. Click on a feature using the selection ![]() cursor or use Select - By name found in the Home ribbon.
cursor or use Select - By name found in the Home ribbon.
11. Right click in the Profile window and select Active window (profile) options. This will open the dialogue box shown in the figure below.
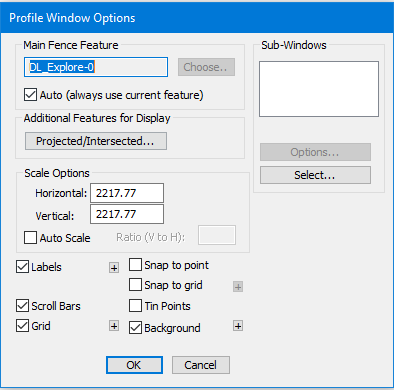
Figure 6: Profile Window Options dialogue box with Auto checked for the Main Fence Feature
12. In this example, the Auto (always use current feature) checkbox is set. Press OK to return to the main screen.
13. Select another DL_Explore feature and the Profile window will update to show it.
If you wish to edit the cable system used in one or more D-Lines, you must select the associated feature(s) then press the ![]() Edit button in the Cable-Analysis ribbon.
Edit button in the Cable-Analysis ribbon.
14. Choose menu ![]() File | New, do not save changes.
File | New, do not save changes.