|
This example we will demonstrate how to export a traverse file to ArcView shape format including attributes and geo-referenced coordinate information.
1. Start the Survey module and open NORTHCR.TR1 (download link above)
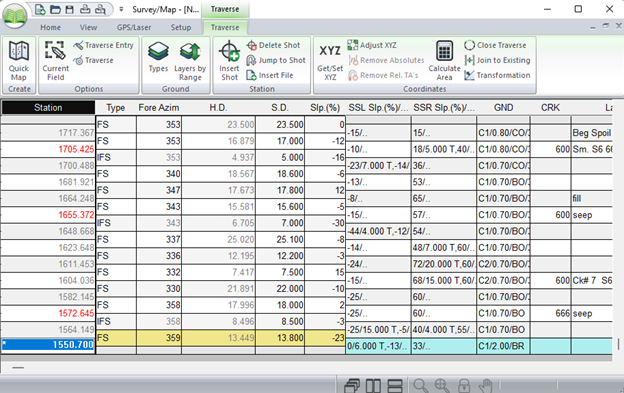
Figure 1: Survey Screen
We will now geo-reference the traverse by setting the start station to a known UTM coordinate.
2. Choose menu Coordinates | Set / Get Coordinates. Enter the easting and northing coordinates as shown in Figure 2 below.
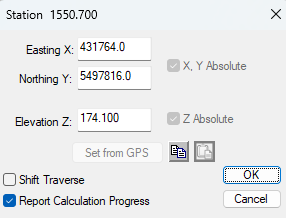
Figure 2: Coordinates Dialog
3. Re-save the traverse and open the Terrain module.
4. Choose menu File | Open and select Files of Type : All Supported Files. Choose file NORTHCR.TR1.
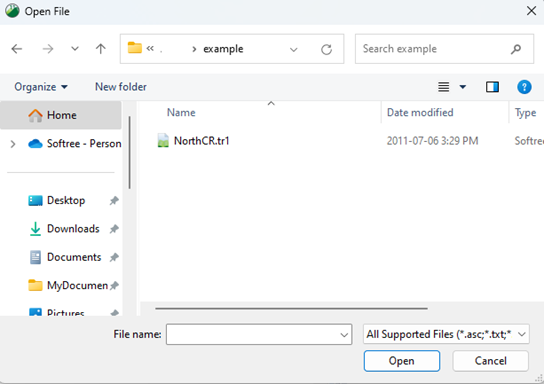
Figure 3: Open a traverse in the Terrain module.
5. Enter the import options as shown in Figure 4 below.
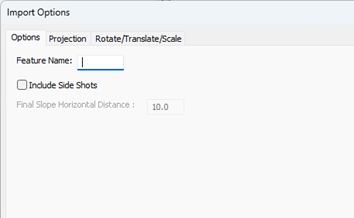
Figure 4: Import Options.
5. Enter the import options as shown in Figure 4 above.
6. From menu Module | Setup, choose the Projection tab. Enter the projection information as shown in figure 5 below.
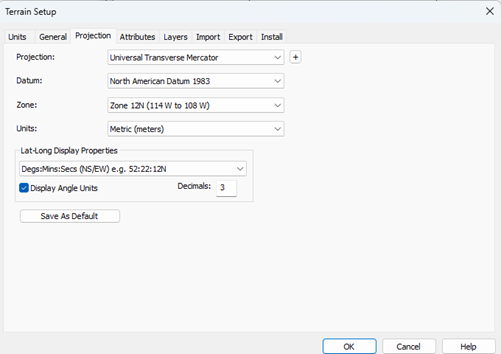
Figure 5: Projection Information
7. Choose menu File | Save As and select Save as type: Arcview Shape (*.SHP). Choose file name NORTHCR.SHP.
8. When the export options appear choose Points and Write Prj file.
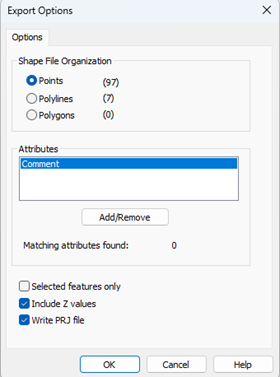
Figure 6: Export Options.
9. When the export options dialog appears choose Points and Write PRJ file.
NOTE: We must export in Point format because shape files will not allow polyline features to have individual attributes. If you wish to also include the traverse polyline feature, you must save it in another shape file with the shapefile organization set to polyline.
10. Click on the Add/Remove buttons and add the point attributes you wish to include in the export.
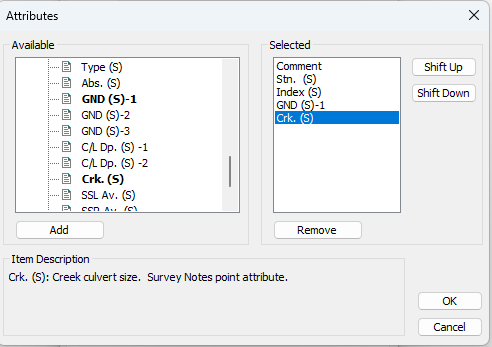
Figure 7: Export Options.
11. Press OK twice to save the shape file.
|


