Mass Haul Diagram
Updated May 06, 2025
This article applies to:
- Softree Optimal
The Mass Haul diagram is a traditional and valuable tool for road design. Some of the quantities calculated with the Optimal Haul are automatically included in the mass haul diagram.
Files for the tutorial below:
-
Download and unzip the Hart Rd Optimal haul.zip file located above.
-
Open Location Module
 .
. -
File | Open. Select Hart Rd optimal.dsnx. Press Open.
-
Maximize
 the Profile window, ensure the Alignment Properties panel is visible.
Pits display
The current alignment, V-align 1, has several pits defined. These pits were used during the calculation of Optimal Haul (calculated automatically on open) and the mass haul diagram shows these quantities as vertical lines in the graphic.
-
In the Alignment Properties panel, expand the tree for V-Align 1 and select the Pits branch.
-
Home I Recalculate Range. Enable Re-cost and press OK.
This will display the pit locations in the Profile window.
-
 denotes a waste pit.
 -
 denotes a borrow pit.
 -
denotes both a waste and borrow pit.
-
Turn on the axis labels in the Profile window (optional)
-
Right click in the Profile window and select menu Profile Options.
-
Set the Grid check box (lower left).
-
Press OK to close Profile Window Options.
Your screen should look similar to the figure below.
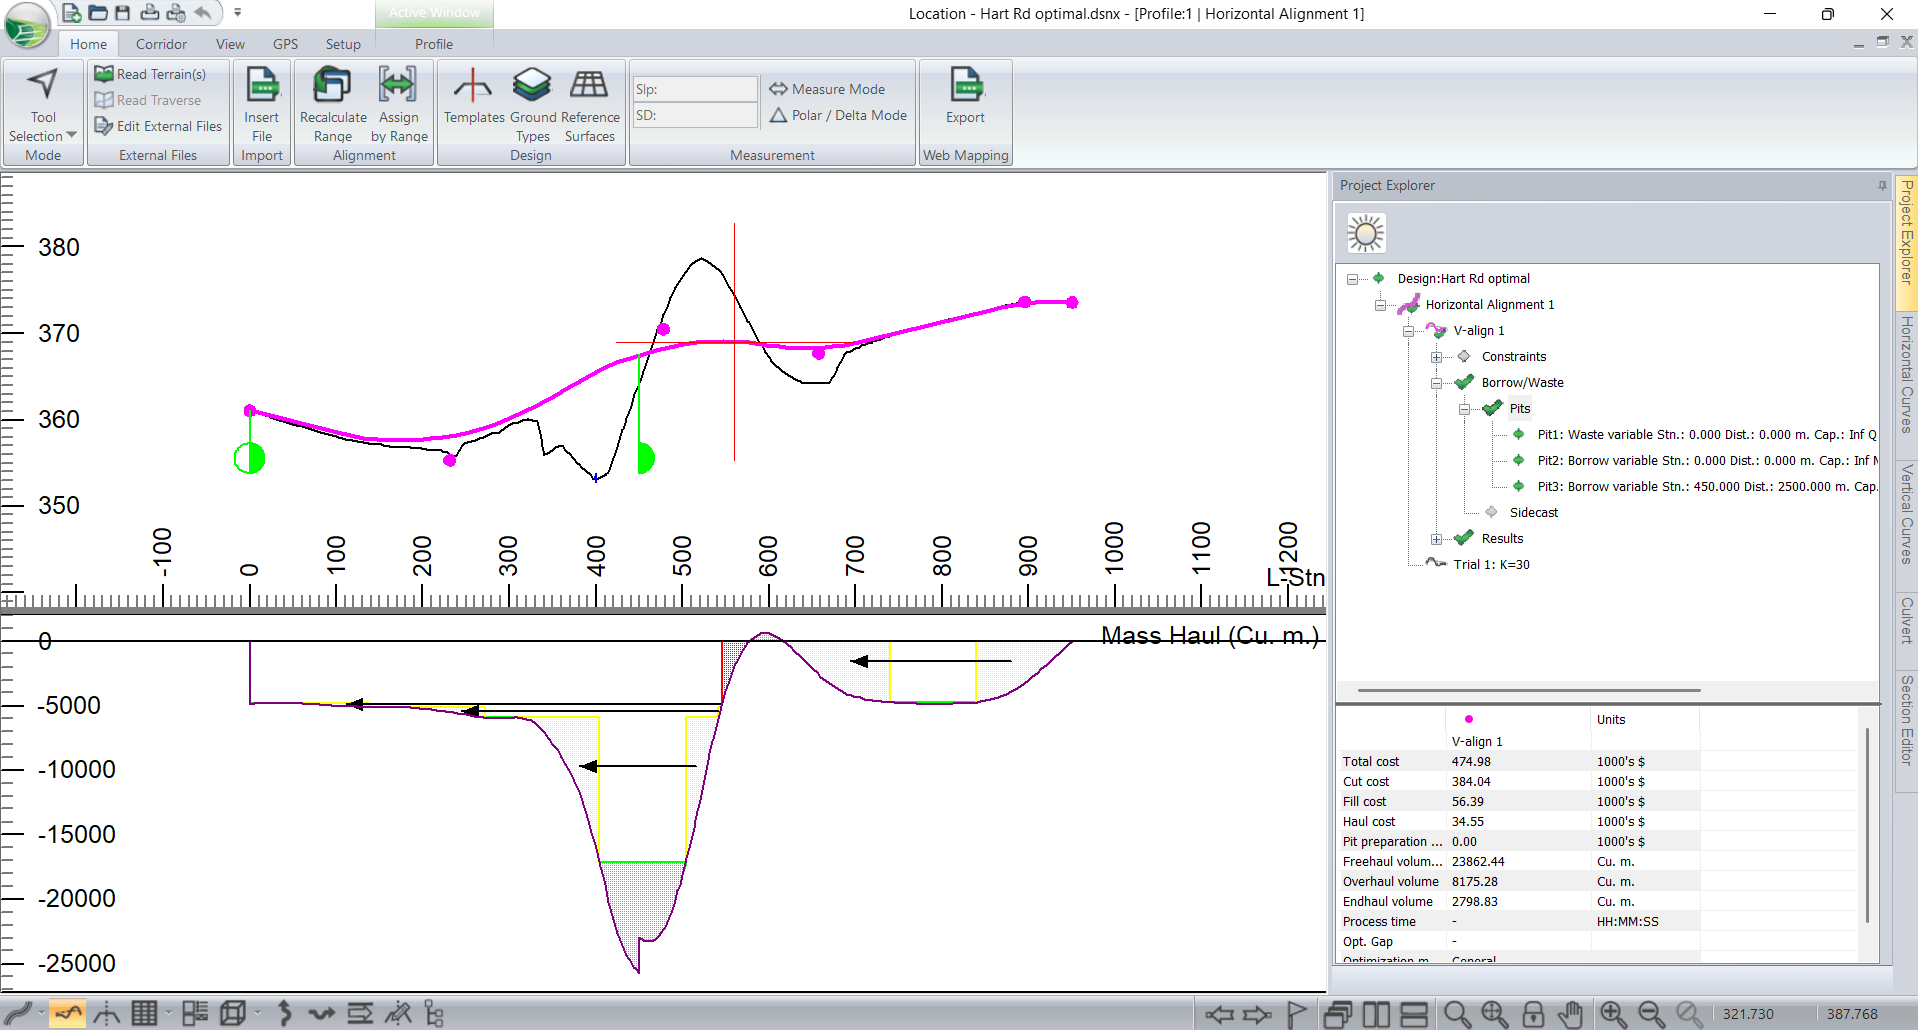
Figure 1: Assigned pits shown in Profile and Mass Haul.
-
Double click on the Pits branch in the tree (or press the Options button in the Vertical Optimization drop-down list and select the Pits tab).
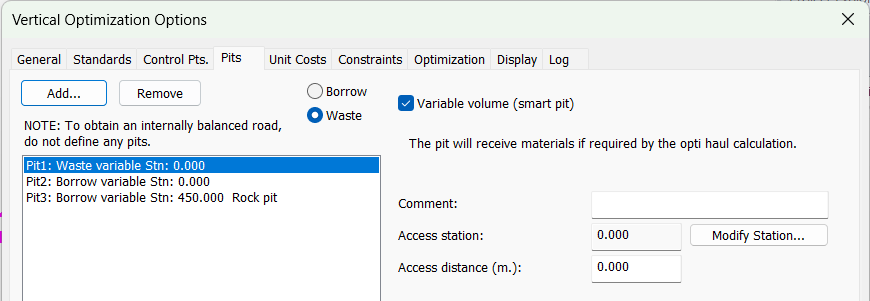
Figure 2: Pits for the selected alignment.
We looked at this design in Chapter 4 and found that we were short of rock (SR) but had an excess of GR. The waste pit at station 0.0 is taking the excess GR, while the borrow pit at station 450.0 is providing the SR. The mass haul diagram reflects these two volume insertions.
-
Press Cancel to close the options dialog box.