Creating Sub-Surface Layers From Multiple Terrain Files
Updated April 02, 2024
This article applies to:
- RoadEng Civil
- RoadEng Forestry
A DTM surface (for example soil/rock interface) in a Terrain file, can be defined as a Sub-Surface layer. Material volumes above and below the surface will be calculated separately. You can have up to 3 layers (up to two surfaces below topo).
First you need to define the sub-surface Terrain:
1. In the Location module, choose menu Module-Setp, Alignment tab.
2. Press the reference Terrains/Surfaces button:

Figure 1 - Location Module Setup
3. Press Add... button and select Terrain File. Then, Press OK.

Figure 2 - New Reference Surface
4. Browse to find the sub-surface to reference and press Open:
Your Reference Terrains/Surfaces dialog should be similar to the Figure below.

Figure 3 - Selection of Reference Terrain Files
4. Press OK and OK again to accept and close.
Then, you need to use the new sub-surface terrain to define your layer depth:
5. Choose menu Corridor - Assign Parameters by Range, Sub Horizons tab.
6. Press the "+" button beside Ground Layers:

Figure 4 - Assign Parameter By Range, Sub Horizons
7. Choose Layer 2 Ground Type, then set the Use Surface check box and pick a Sub surface from the list:

Figure 5 - Configuring Ground Layers to Reference Terrains
8. Press OK; note that your ground layers are now defined with "REF1" as the depth value:
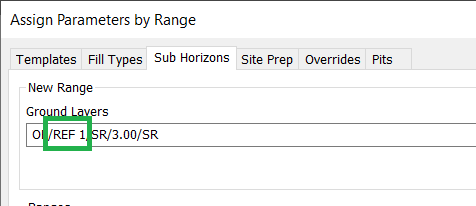
Figure 6 - Defined "Depth" for Ground Layers
9. Adjust your station range and and press the Add/Edit button.
10. Press OK and re-calculate.