Creating a Post-Design Surface
Updated August 22, 2024
This article applies to:
- RoadEng Civil
- RoadEng Forestry
The tutorial files referred to in this article can be installed from the Updates section of support.softree.com. See Getting Started for additional information on tutorial files and the location of file install folders.
In this section, we will demonstrate how to merge a location design with the original ground surface and generate a post-design surface.
1. File | Open, select \Softree\TrainingV10\RoadEngCivil\Location2
2. Choose File | Save As and choose Save As Type as Softree-Terrain (.terx) from the drop-down.
3. Enter a name bluff_road_terrain.terx and press OK. The Export to Terrain Dialog box will appear.
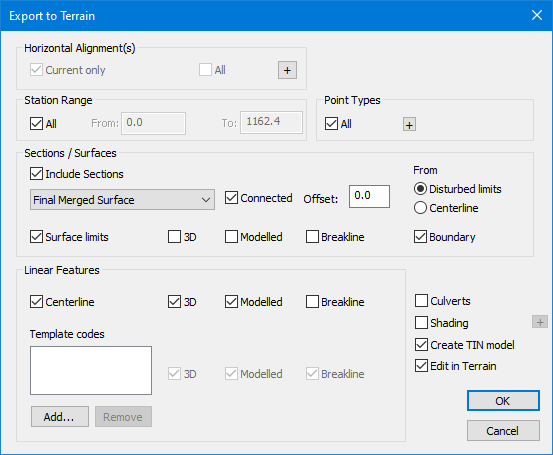
Figure 1 – Export to Terrain Dialog
4. Set the parameters as shown in Figure 1 above and press OK to save the file.
5. The Terrain module should open the new .terx file automatically. If it doesn't, minimize the Location module and open bluff_road_terrain.terx in the Terrain module
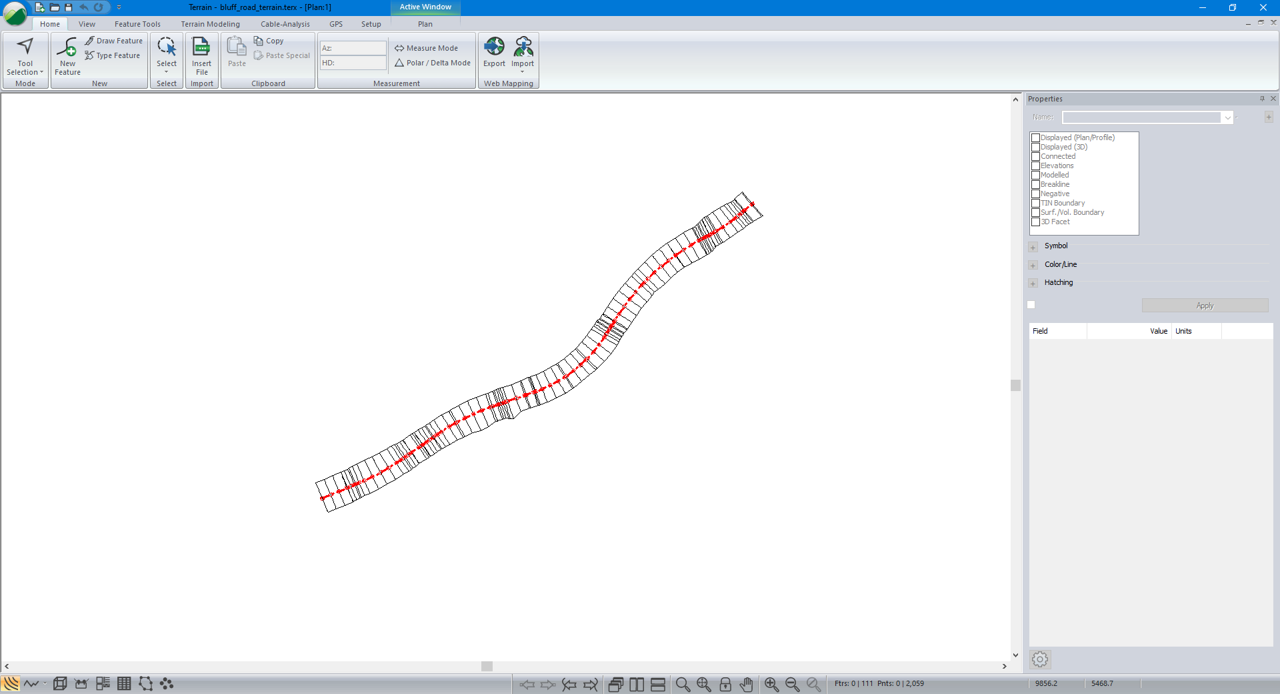
Figure 2 – bluff_road_terrain.terx
Notice the Terrain file contains design coordinate information along the road corridor.
6. Open the original ground surface bluff_road.terx. (in same training folder)
7. Choose Terrain Modelling tab | Merge Terrain. The Merge Surface Dialog will appear:

Figure 3 – Merge Surface Dialog
8. Enter bluff_road_terrain.terx saved in step 4 above as the Source (use the browse to find it).
9. Press OK when the Warning No Space for Undo message appears.
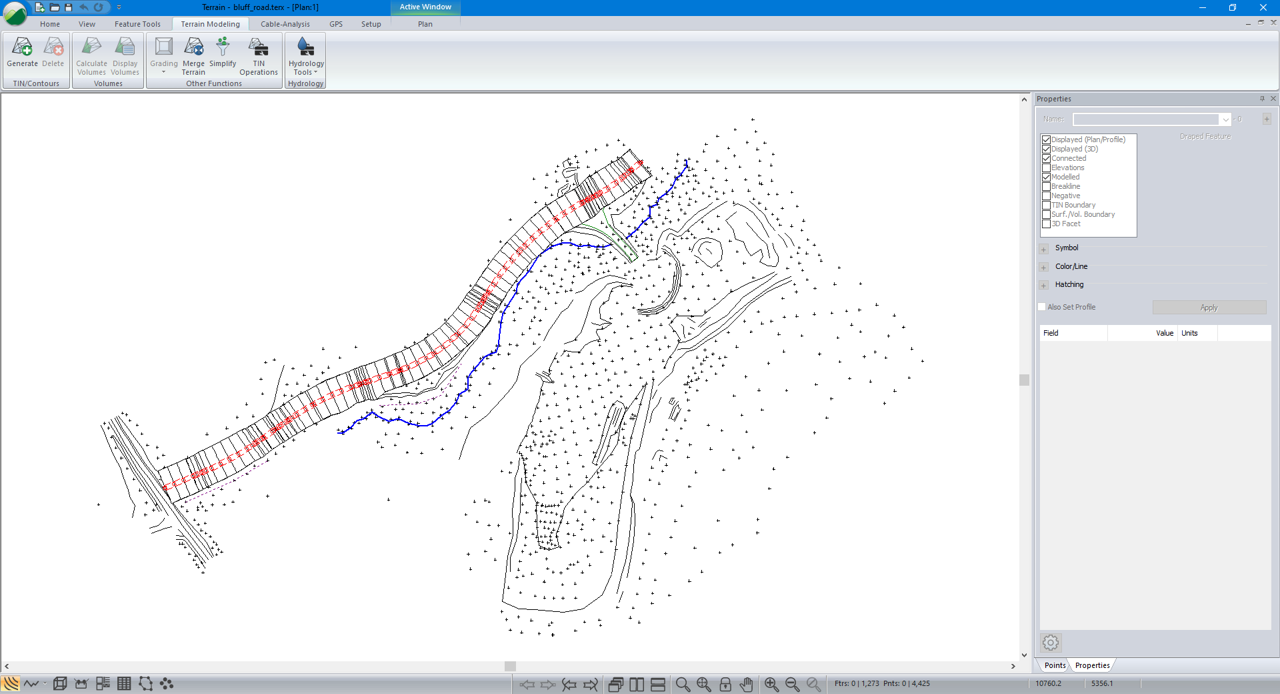
Figure 4 – Terrain File After Merge
10. Navigate to Terrain Modelling| Calculate Terrain Model and set the parameters as shown in Figure 5 below:
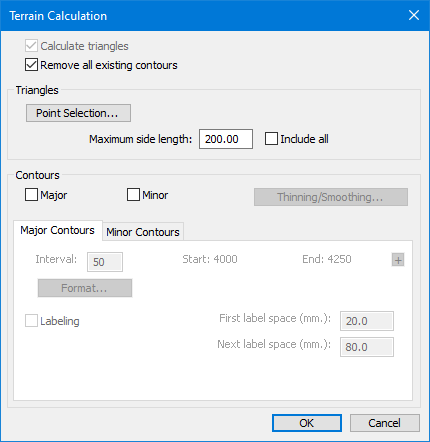
Figure 5 – Terrain Calculation Dialog
11. Choose View | New Window | 3D. A 3D view of the design road merged into topography will appear similar to Figure 6. (or press the 3D window icon in the bottom navigation bar)
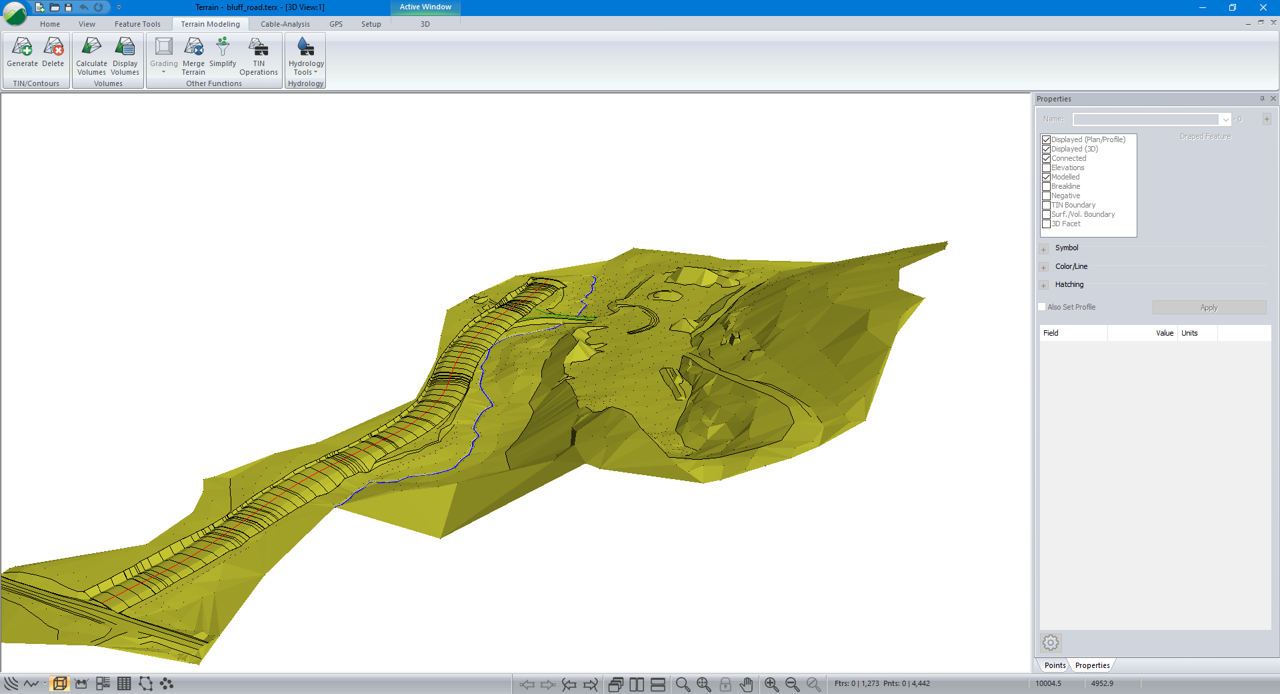
Figure 6 – Terrain Merged with Topography
12. Choose File | Close. Don’t save changes.