How To Upload and Share Files with Softree (Step-by-Step)
Updated February 07, 2025
This article applies to:
- Terrain 3D
- Terrain Forestry
- RoadEng Civil
- RoadEng Forestry
When you are subscribed to Softree Support you have access to a variety of contents, assist and help.
Depending on the complexity of the question you might be requested to upload your files to our Sharefile website for us to have a look at them.
SUGGESTION: For sharing existing RoadEng files, please leverage the Save As Zipped Project functionality described <HERE>
You can upload your files using the link below.
Upload your files
Step 1 - Open the Softree Sharefile website.
Open the link shown above.
You'll be directed to a website similar to below.
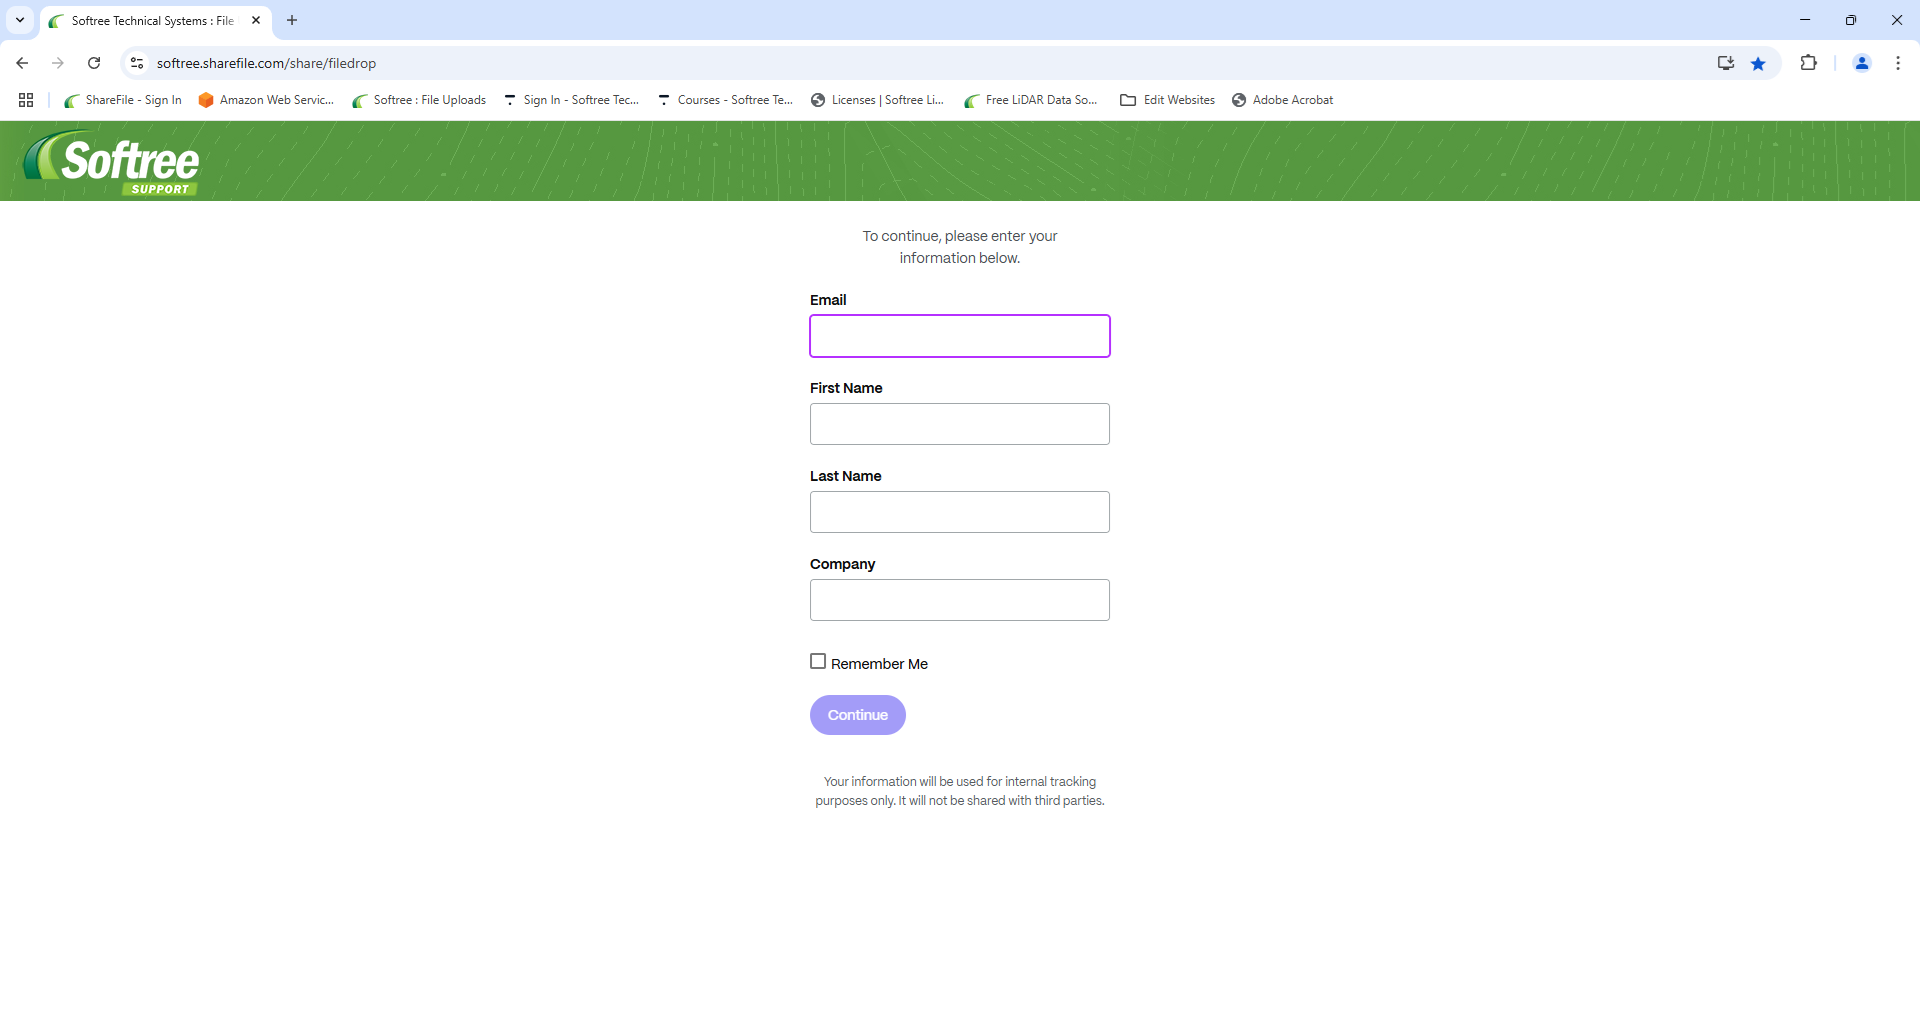
Figure 1: Sharefile filedrop website
Please enter the information requested and press Continue.
Step 2 - Select the Recipient
Use the Recipient drop-down list to select File Uploads Softree Technical Systems as shown below.

Figure 2: Choose recipient drop-down list.
Step 3 - Drag or Browse the files
Now, you can either drag the files into the rectangle highlighted in white or browse to find the files to upload.
Note: The rectangle to drag the files or the browse button won't be activated if you have not selected the recipient before.

Figure 3: Drag area and Browse files button.
In this case, we browsed to find and select the files in our computer.
Step 4 - Select the files
Select all the files (Ctrl key + left-click) and Press Open

Figure 4: Browse to select the files.
Step 5 - Check the files to upload
You'll receive a preview of the selected files before importing, where you can check if any file is missing.

Figure 5: Preview of the files to upload
Step 6 - Press Upload button
Press Upload button to submit the files.
You'll receive a green "Uploaded" notification next to each file, confirming that the process has finished succesfully.

Figure 6: Files uploaded succesfully.